Smart and creative hacks to shoot viral photos with Kenko AI Flash! Vol.1
In this series of 7 articles we will introduce smart and creative hacks to shoot amazing photos using the Kenko AI Flash AB600-R from famous Japanese photographer Kazuyuki Hagiwara.
Why don't you challenge yourself to take the same photos!
This time I tried to capture a decorative Christmas tree displayed in my office. It was just put there without any decorative lights, so I tried to use a flash light to give it some "impressiveness" in the final image. The equipment I used is one Kenko AI Flash AB600-R and its wireless transceiver WTR-1.
Since the tree was put in front of a wall, I wanted to shoot in in two settings:
- Hitting the wall with the flash's light;
- Hitting the tree from below directly with the flash’s light.
As for scenario number 1, I imagined a shot where, by hitting the wall with the light, the resulting rebounding light works as a backlight. I arranged the setting as below:
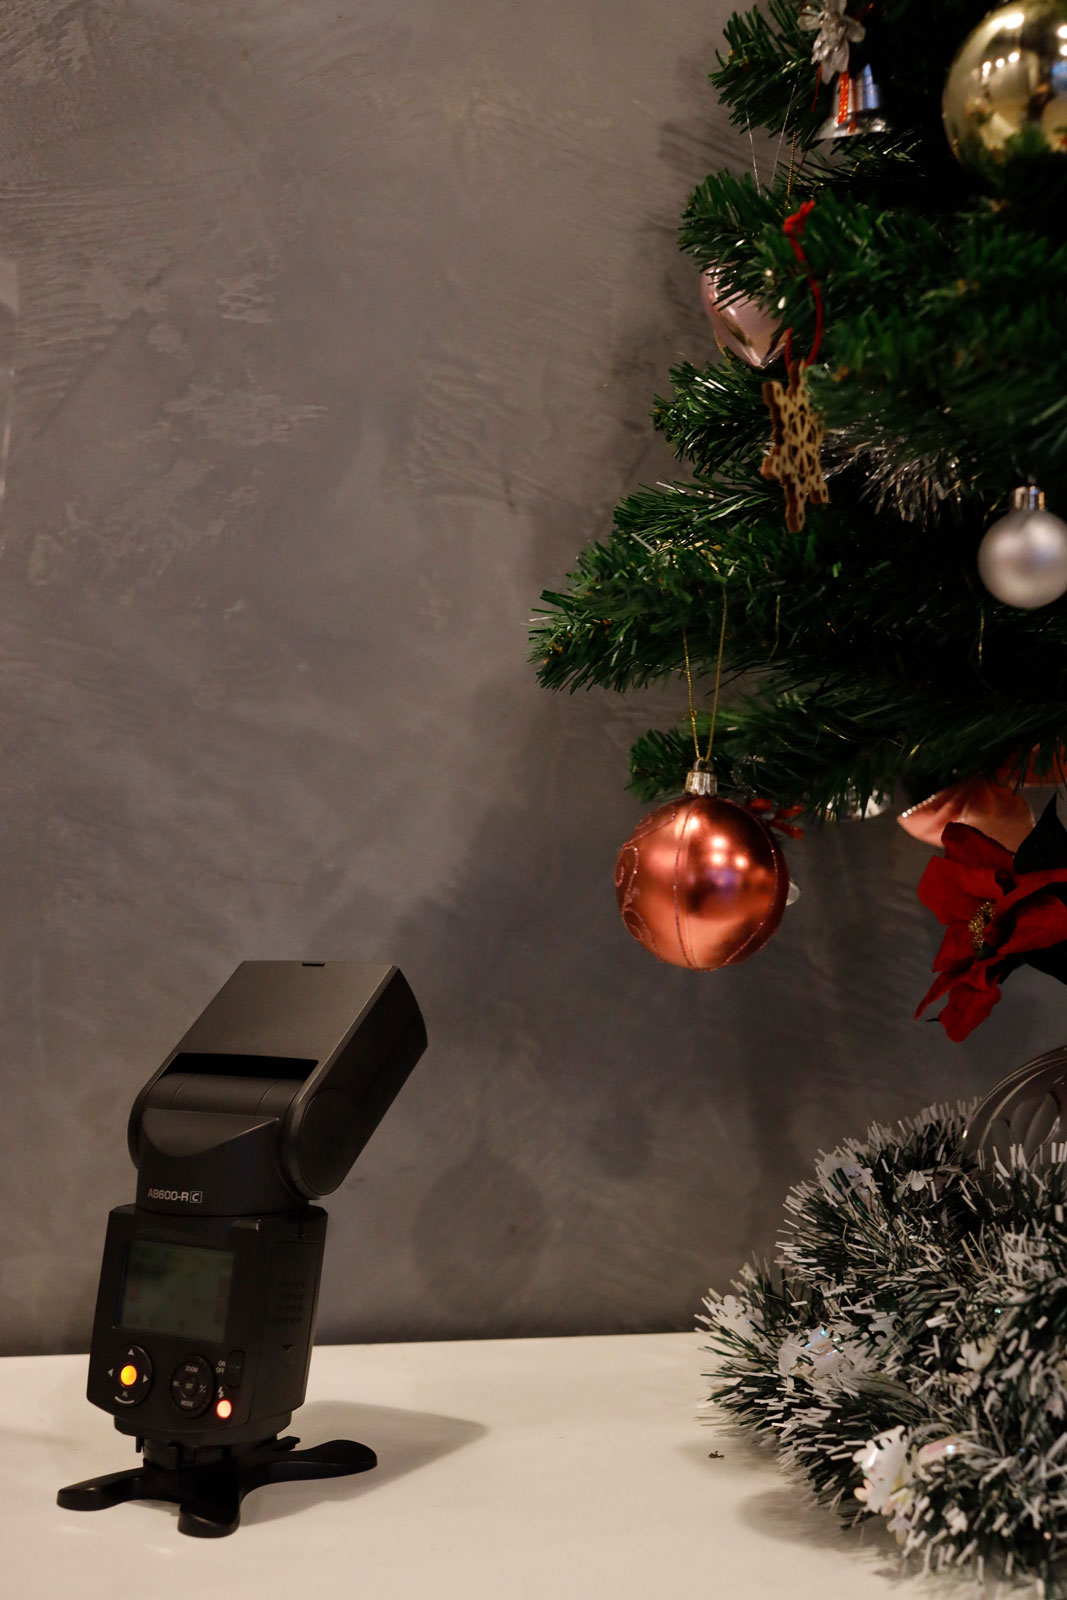
After deciding the composition, I set the flash angle so to reflect on the portion of the wall right behind the tree. I have also fine-tuned the amount of light while shooting.
Here is the final shot (see picture below): shot from a bright and shiny side angle, you can almost feel the calmness of the tree, like a watching guardian.

As for scenario number 2, by arranging the light source to achieve an upwards light, I tried for a picture in which the tree looks like emerging above the light. Hence, I arranged the setting as below:
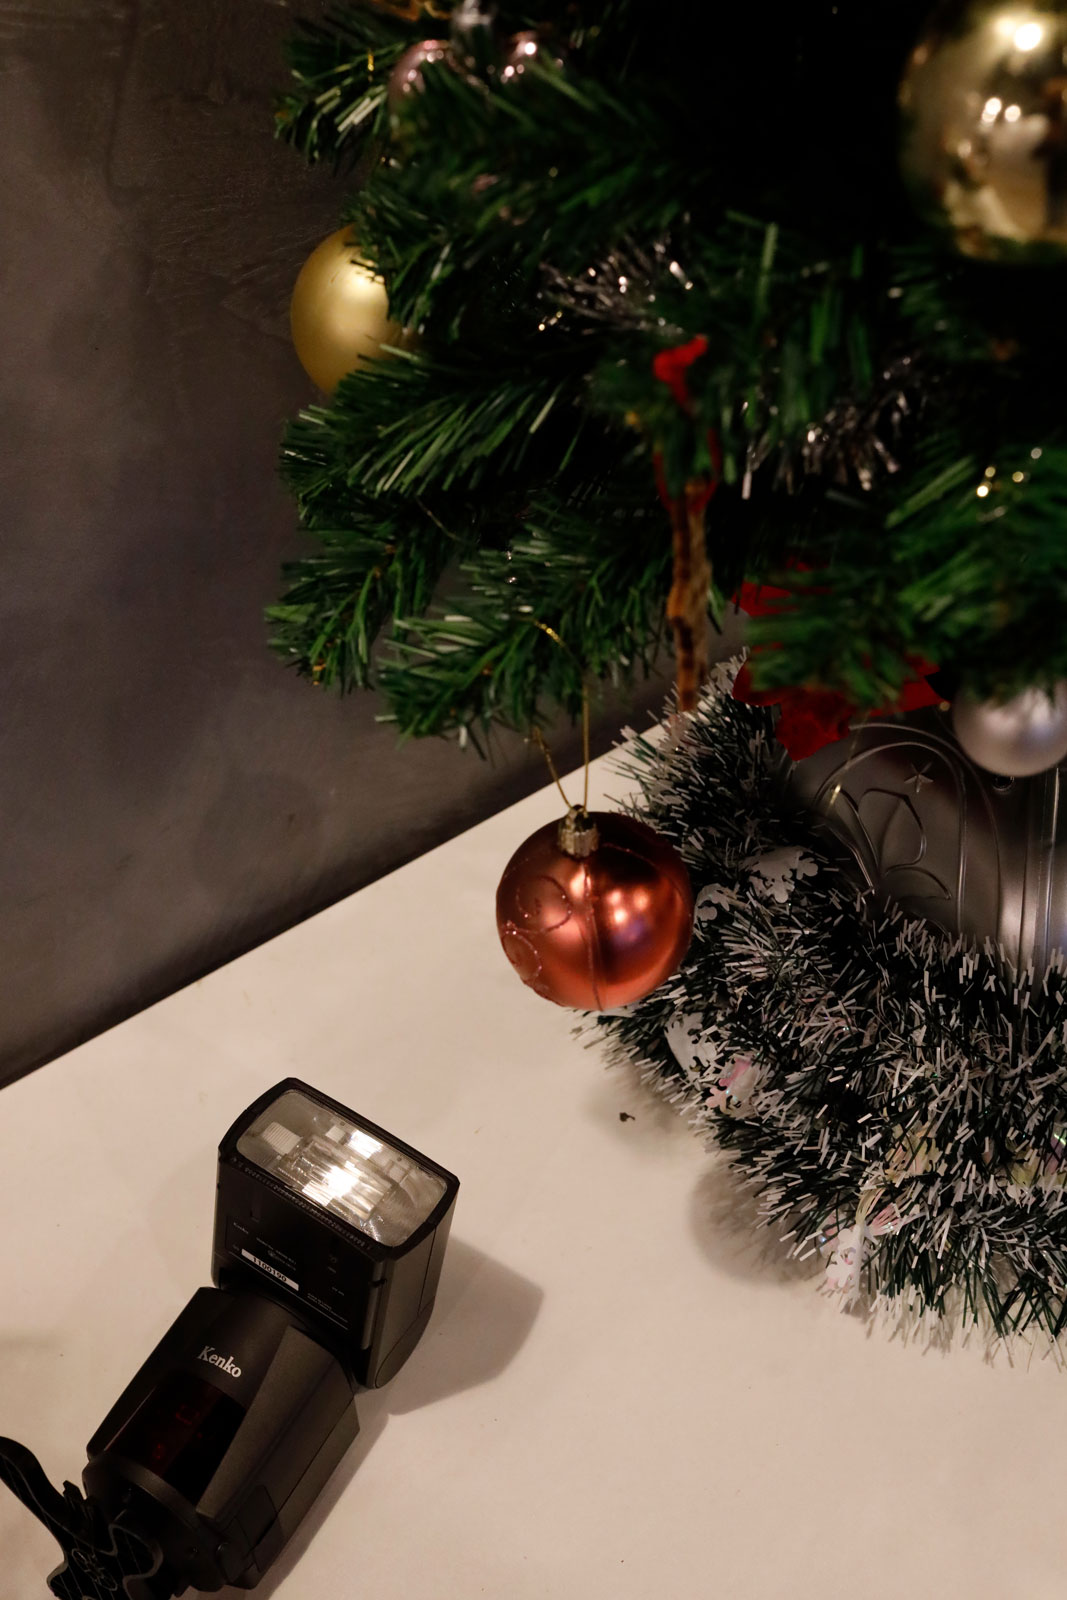
Aiming for a light hitting the tree from the lowest possible position, I set the flash light lying down on the floor. Since the amount of light itself can be managed with the wireless transceiver WTR-1, there is no particular problem in not seeing it with the flash.
As for the composition, for a better comparison I went for a similar to that of scenario number 1.
I also decided to set the flash light's position so to hit the leaves on the bottom of the tree.
The final shot is as below. Unlike with backlight, the light cut here gives a more gorgeous feel.

By the way, the image captured under the original light conditions, without using the flash light, is this:

By using a flash light, I was able to make an impressive shot, very differently from shooting with common indoor electric lights.
I also made a long exposure shot from close-up and without changing the flash light position.
First, here is the shot with using the flash similar to scenario number 1, with the light bouncing from the wall.
The image has a calm atmosphere and somehow conveys a feeling of luxury.

Next is the shot using the flash in a similar way to scenario number 2, with the light hitting from below.
The result is a soft, gentle and gorgeous image, like in a fairy tale.

For me it was not a matter of which one is better, but rather experiencing again how the appearance of the same object could greatly change depending on how the flash is placed and on how the light is applied.
This time, I shot in front of a gray wall and didn't use a reflector, but having a white wall function as a reflector the light will bounce and move a lot, and who knows what totally different atmosphere the final photo could have had!
It is a great idea to play around with the direction of the light's reflections and the color of the wall.
Main points:
- Reflect on a white light wall (white reflector) to create backlight.
- When the flash is applied from below, the light will come in from a lower position.
- Changing the direction of the flash light will also change the atmosphere of the photo. Try to find your favorite position.
Absolutely worth a try!
See you next time!
#Flash #AIFlash #AI #AB600-R #AB600R