Smart and creative hacks to shoot viral photos with Kenko AI Flash! Vol.2
In this series of 7 articles we will introduce smart and creative hacks to shoot amazing photos using the Ken-ko AI Flash AB600-R from famous Japanese photographer Kazuyuki Hagiwara. This article is the second.
Why don't you challenge yourself to take the same photos!
This time a single flower.
It would have been nice to try capturing a vibrant and shining real flower but at the last minute I felt sorry because I would have had to cut it off, so I ended up using an artificial one.
For the background I used a background paper sheet bought at a 100-yen store (Note: similar to dollar store), as well as other items, like one of those postcard holding clips, which I used in order to keep the flower steady.
First of all, I attached the background sheet to a pole, as you can see in the picture below:
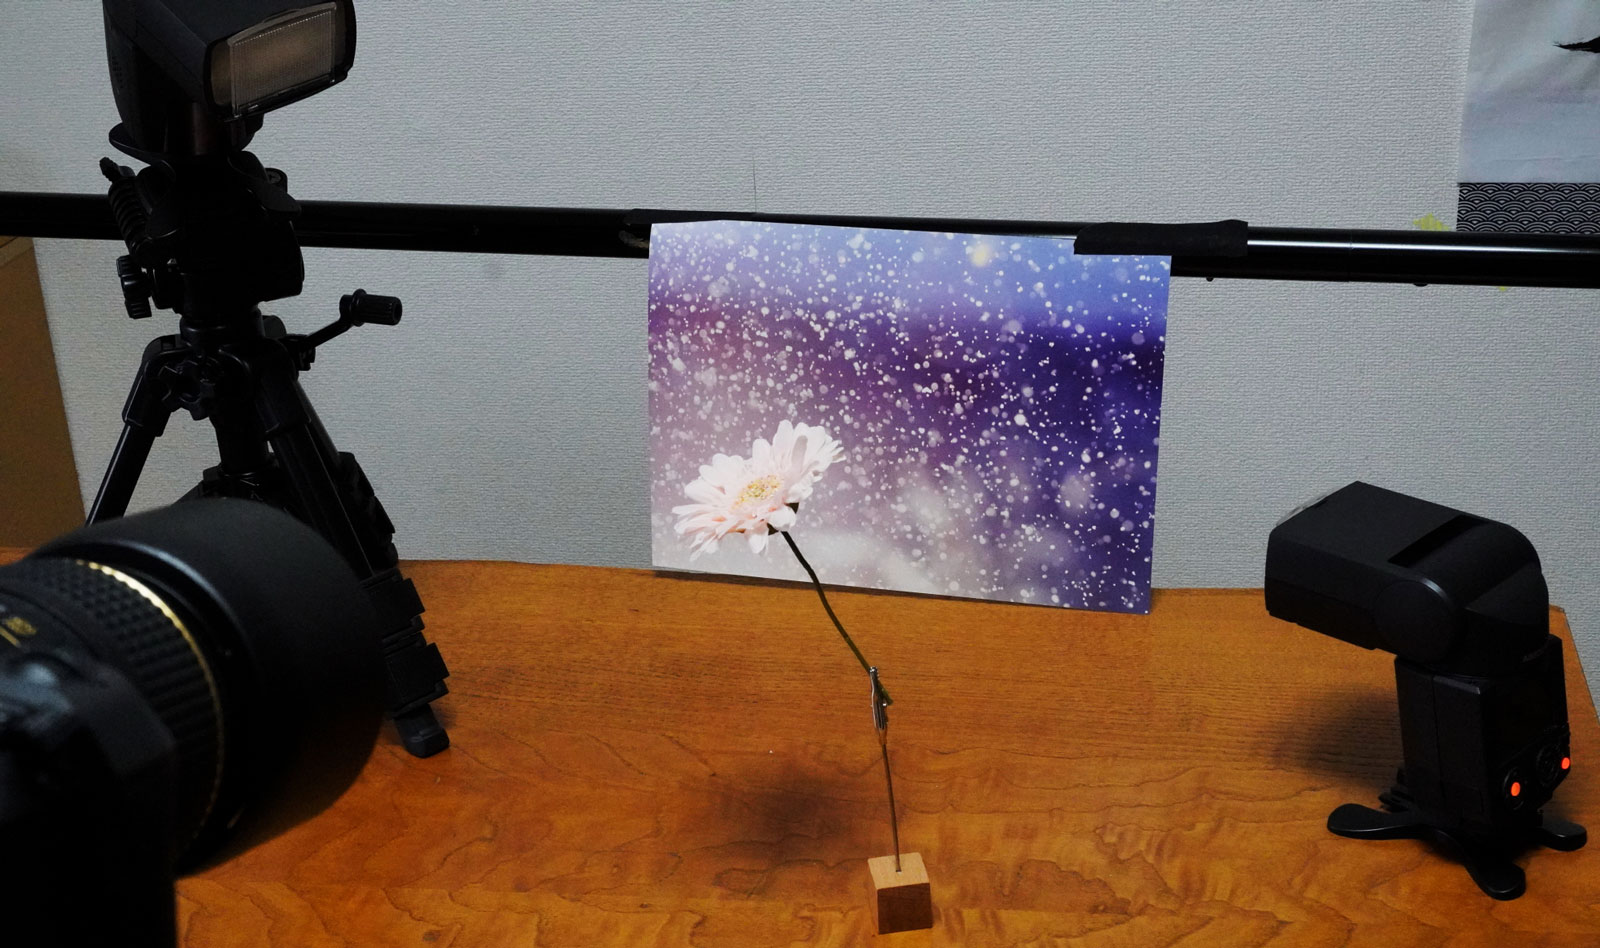
You can attach this sheet to a wall as well, as long as it stays attached.
The flash light I used is the Kenko AI Flash AB600-R (2 units) and its Wireless Transceiver WTR-1. I used one unit as the main light source, and the second one to hit the background sheet.
As both the artificial flowers and the background are close to the flash lights, I decided to shoot with using manual light intensity at 1/128 and wide panels in the hope that the light would be softer.
The position of the two flashes was just a rough idea to start off with.

By chance, I had set the brightness of the background just right with the first try. The second step now was to set the main light source.
The first thing I did was to put the flash down and try to backlight the subject.
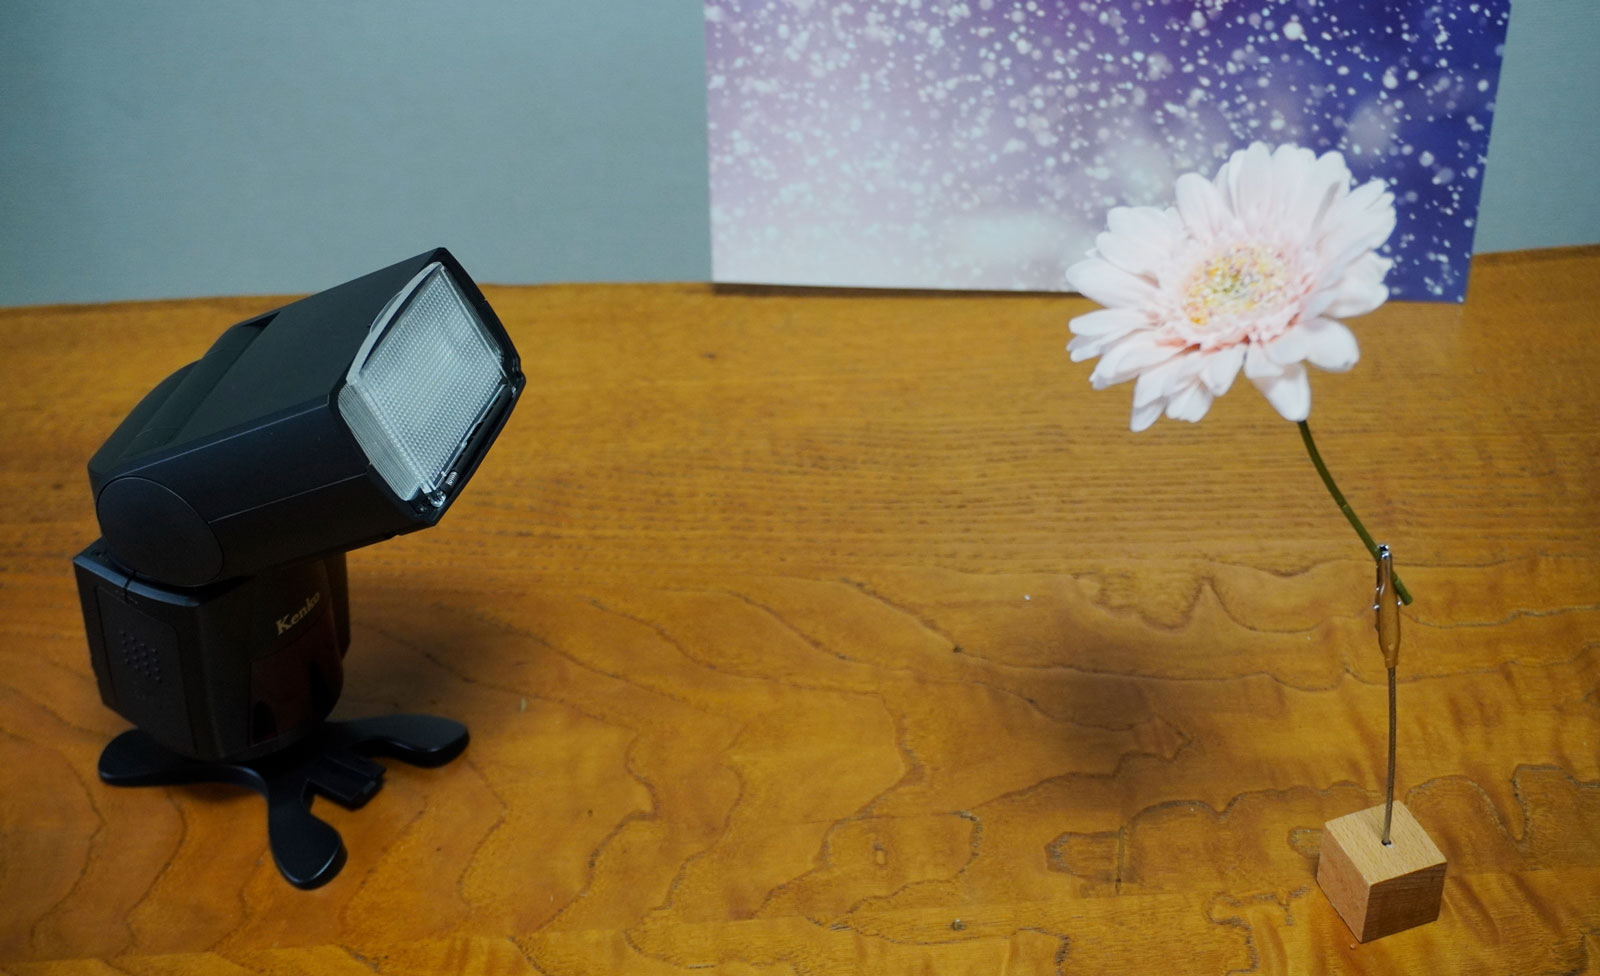
This is the resulting photo:

The flower itself ended up darkened. It was a gerbera-looking artificial flower. I felt that the surface of the flower had to be exposed more to light, so I tried lighting from a slightly higher position, diagonally from behind, hitting towards the surface of the flower:
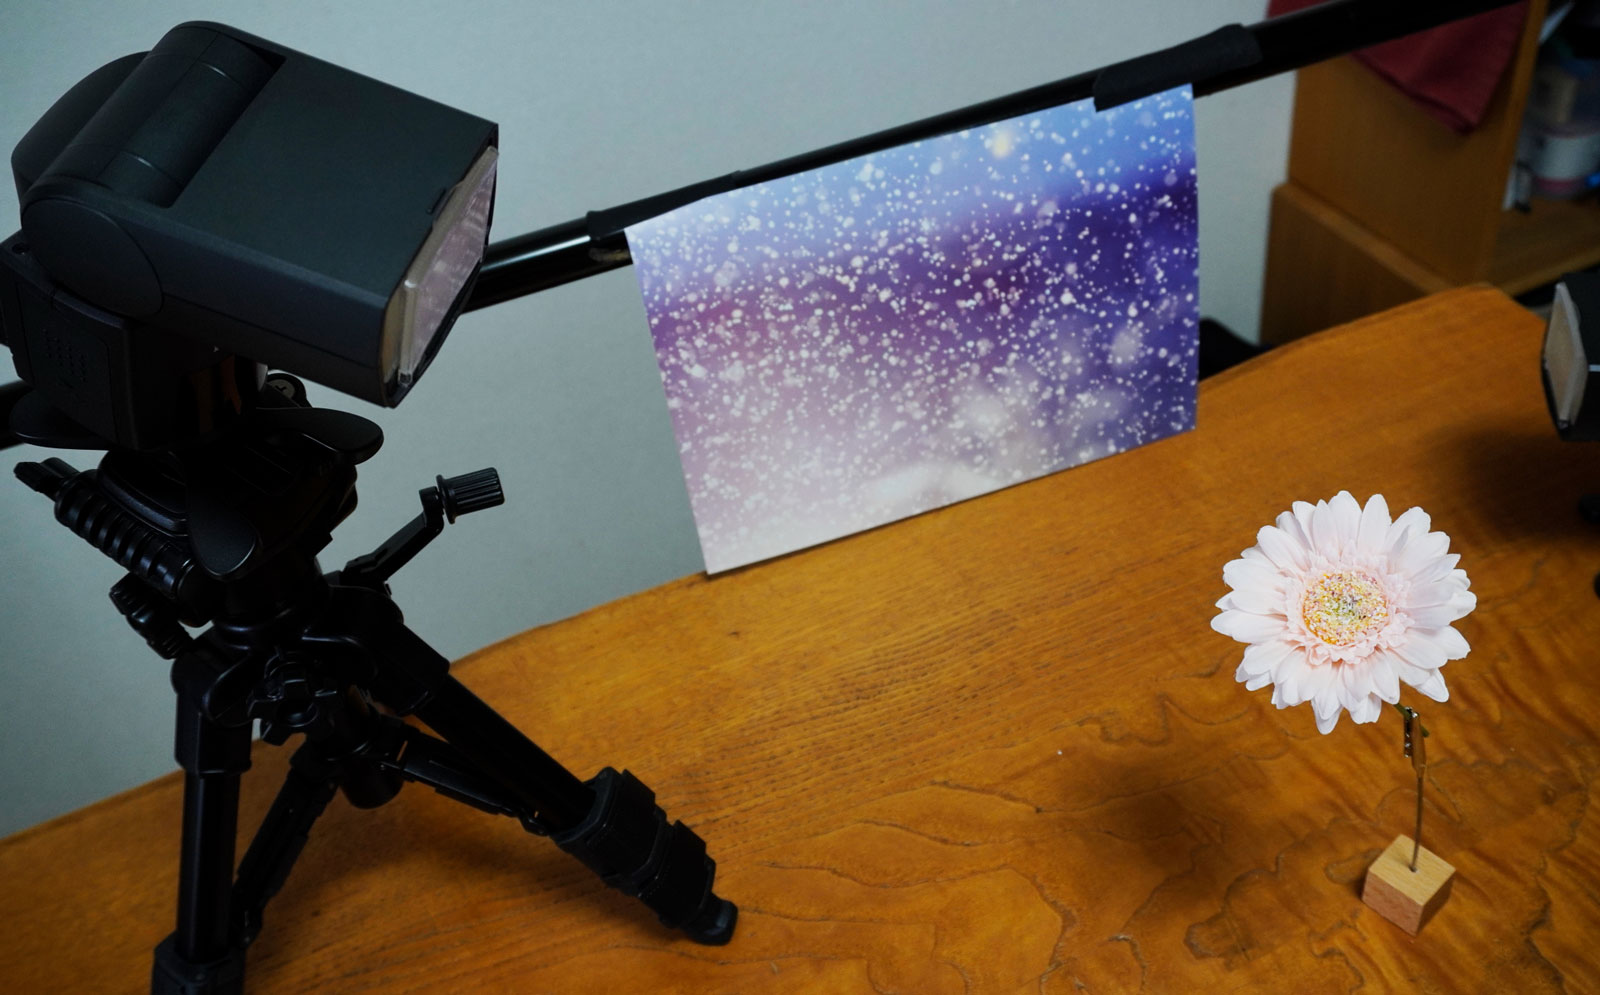
This is the resulting shot:
I was happy with this lighting because it gives a good view of the whole flower, and the backlighting makes the lines stand out and lets it look more three-dimensional.
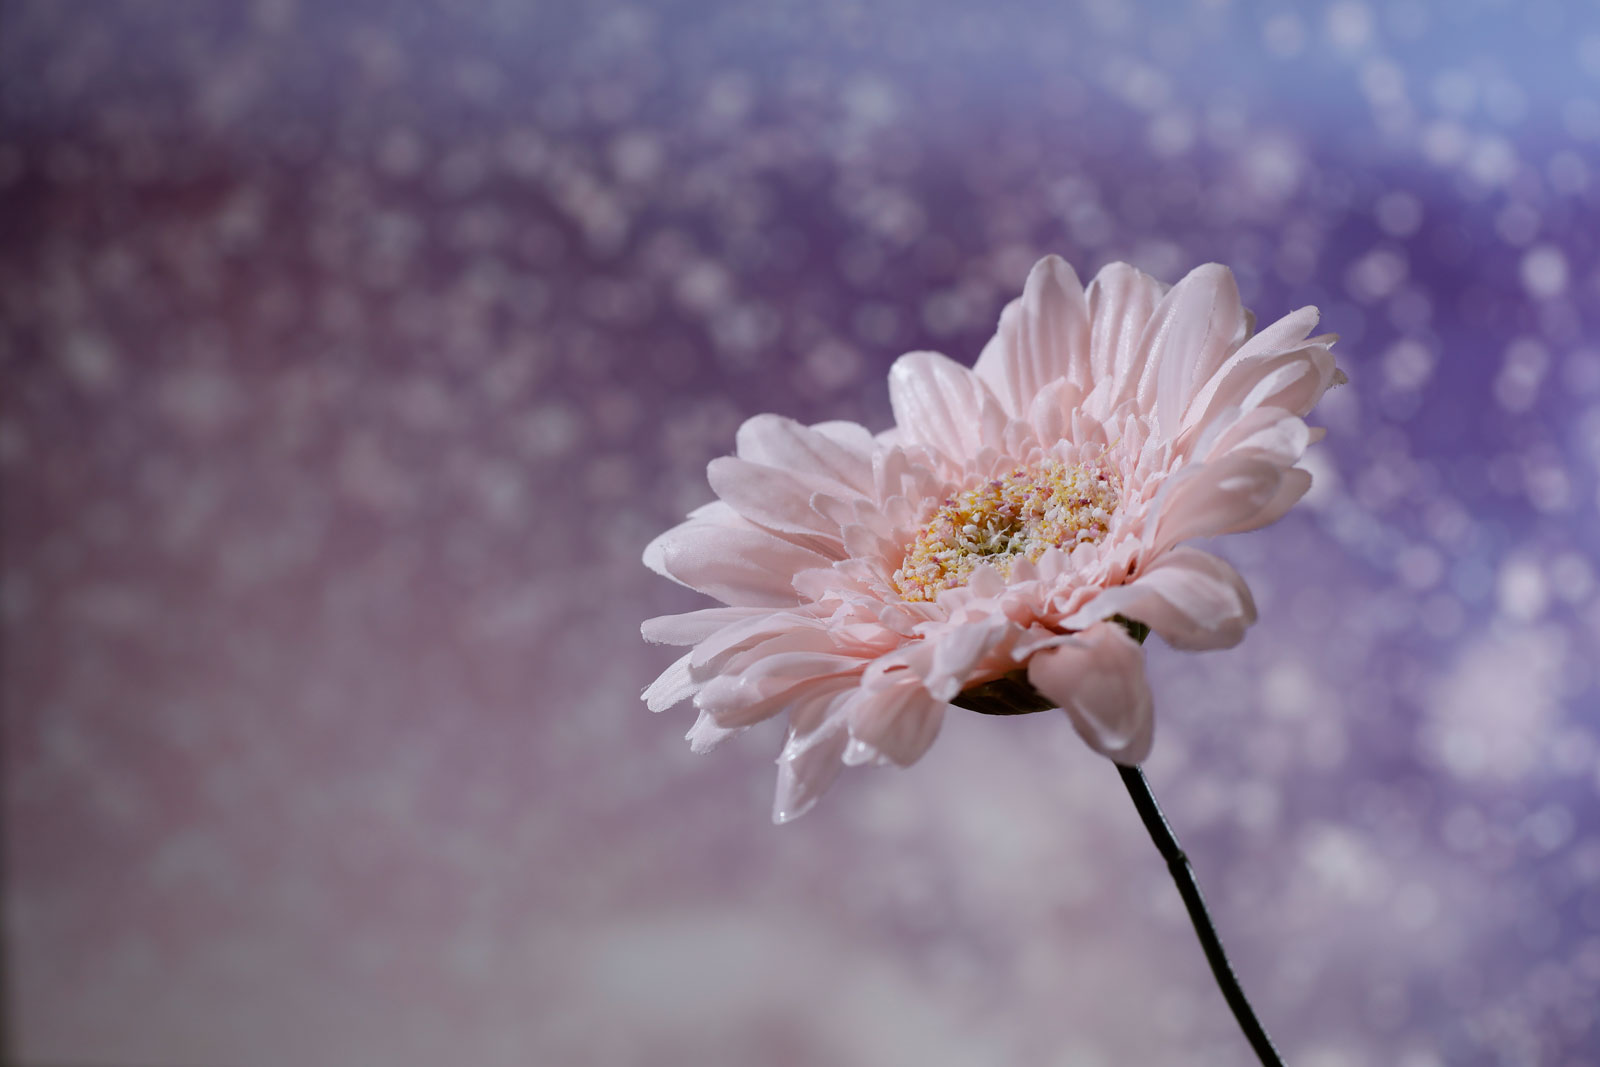
With this, the preparation of the light setting was complete. What was left was some brightness fine-tuning.
The equipment used was a Canon EOS-R camera with a 100mm macro lens. As for the light amount, both flash light units were manually set at 1/128.
The resulting image is this:
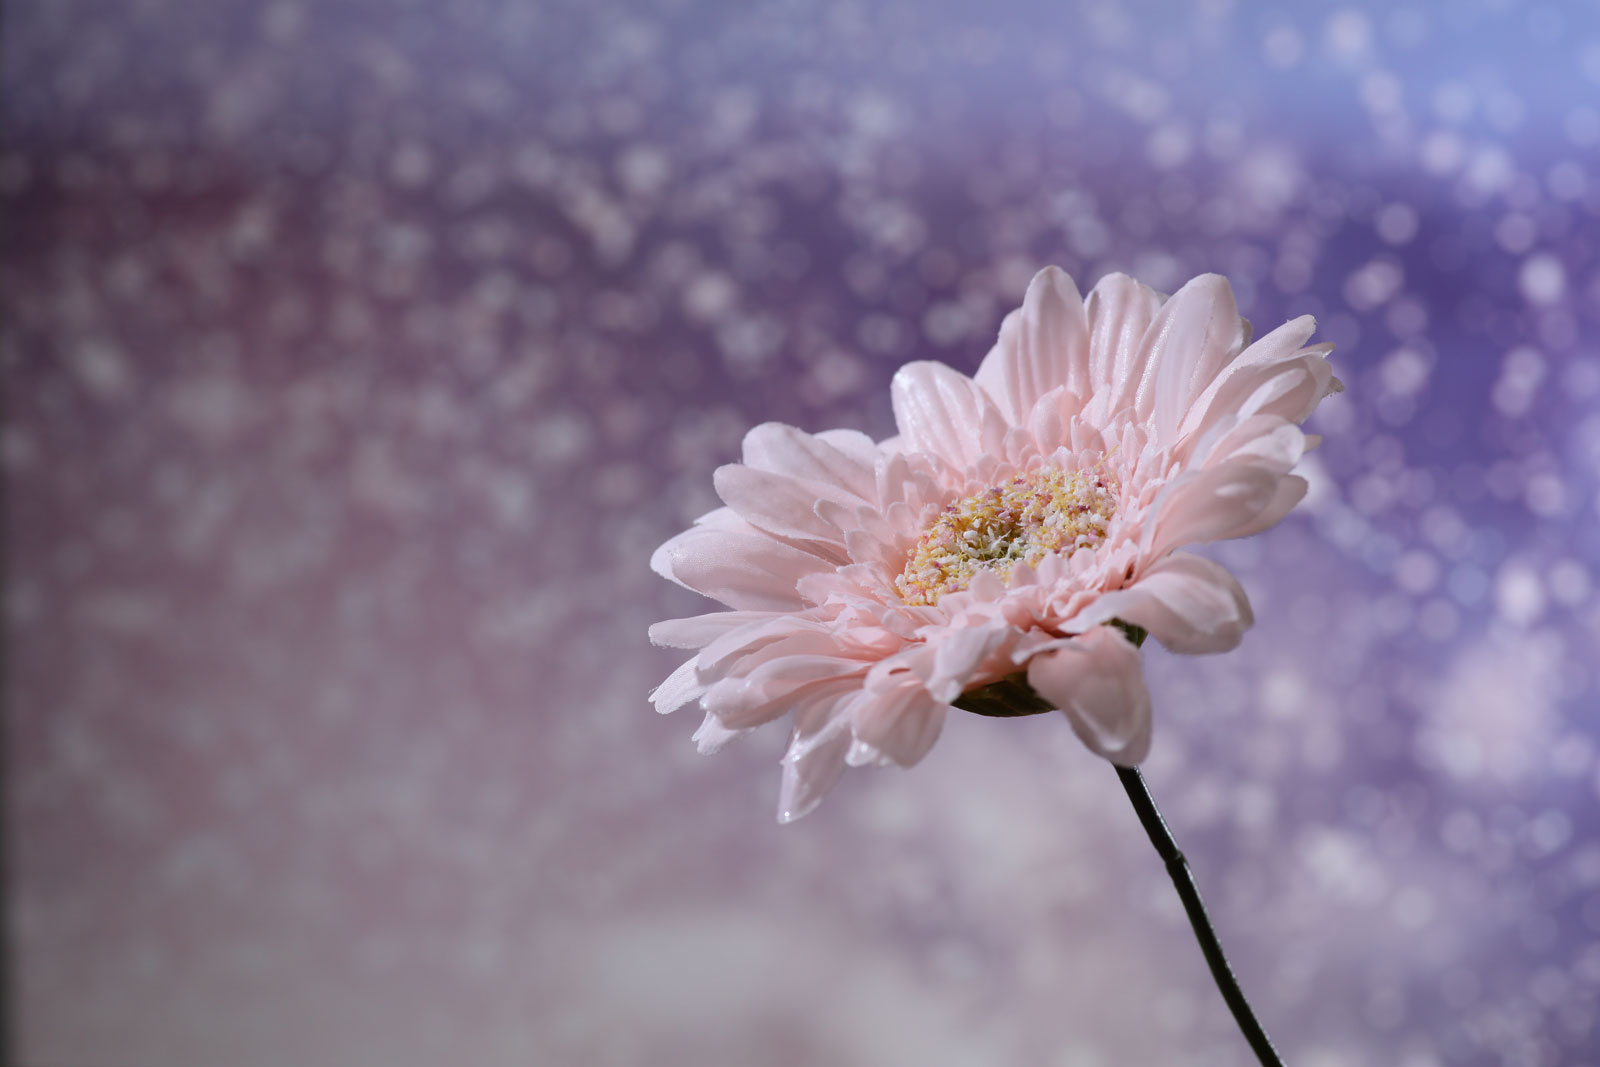
To be able to change the angle where the flower is held by the clip was very helpful.
Background papers often come in sets with several different designs. This is nice because you can choose the one that best suits your mood and atmosphere.
I used two flashes this time. One was used for the main light and the other for the background light.
I wanted to try multi-flash lighting from two light units while considering the division of roles between which flash produced which light.
Main points
- Two light units, one as the main light source to hit the flower, the other to light up the background.
- Start with a minimum amount of light.
- Depending on the shape of the flower, observe and change the position of the flash light unit used as the main light source.
Absolutely worth a try!
Next time, let's try for a more sizzling feeling! Looking forward to it!
#AIFlash #Indoor #Flower #Shootingtips