A beginners guide to long exposure photography
So, you've seen pictures of the silky smooth waters and the dreamy skies and you've made the decision to try and achieve this style for yourself. It's time to plan!
Before you decide to fly out the front door, some prior preparation is going to be required. What is it that you're going to shoot? Cityscapes? Seascape? Waterfalls? Have you looked on Streetview for good vantage points or spoken to other photographers in the area? It pays to have a good understanding of the area, as sometimes chasing a shot can be time sensitive! There are phone Apps that can assist in planning for a shoot. PhotoPills would be the most popular App out there, but I have been supporting an Android app called PlanIt! for some time now. PlanIt! currently helps photographers plan for Milky Way Photography, Sunset & Sunrise, Meteor showers and much more!
 The next major thing is equipment! You will need to have a camera with a manual mode so you can manually control Shutter speed, aperture, ISO and focus. Another crucial piece of equipment are your legs, a nice and sturdy tripod is required to keep your camera locked in the same position over the duration of the shoot. The only items we require now are a remote trigger, and the star of the show, a neutral density filter.
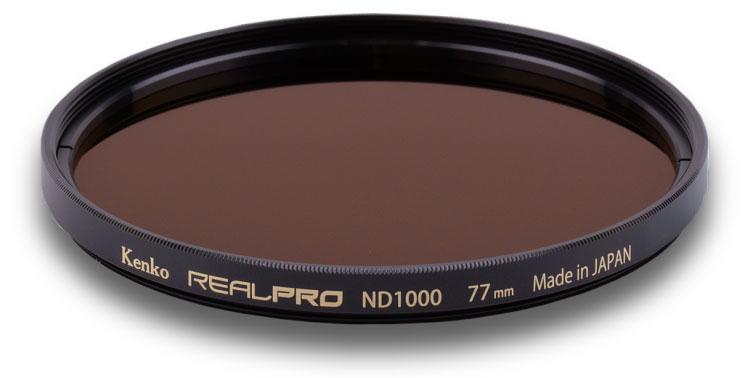
In this demonstration I will be shooting a sunset cityscape with the Kenko REALPRO ND1000 filter. The ND1000 will provide me with a reduction of 10 stops. This reduction is how I will achieve the soft water and silky skies.
Composition
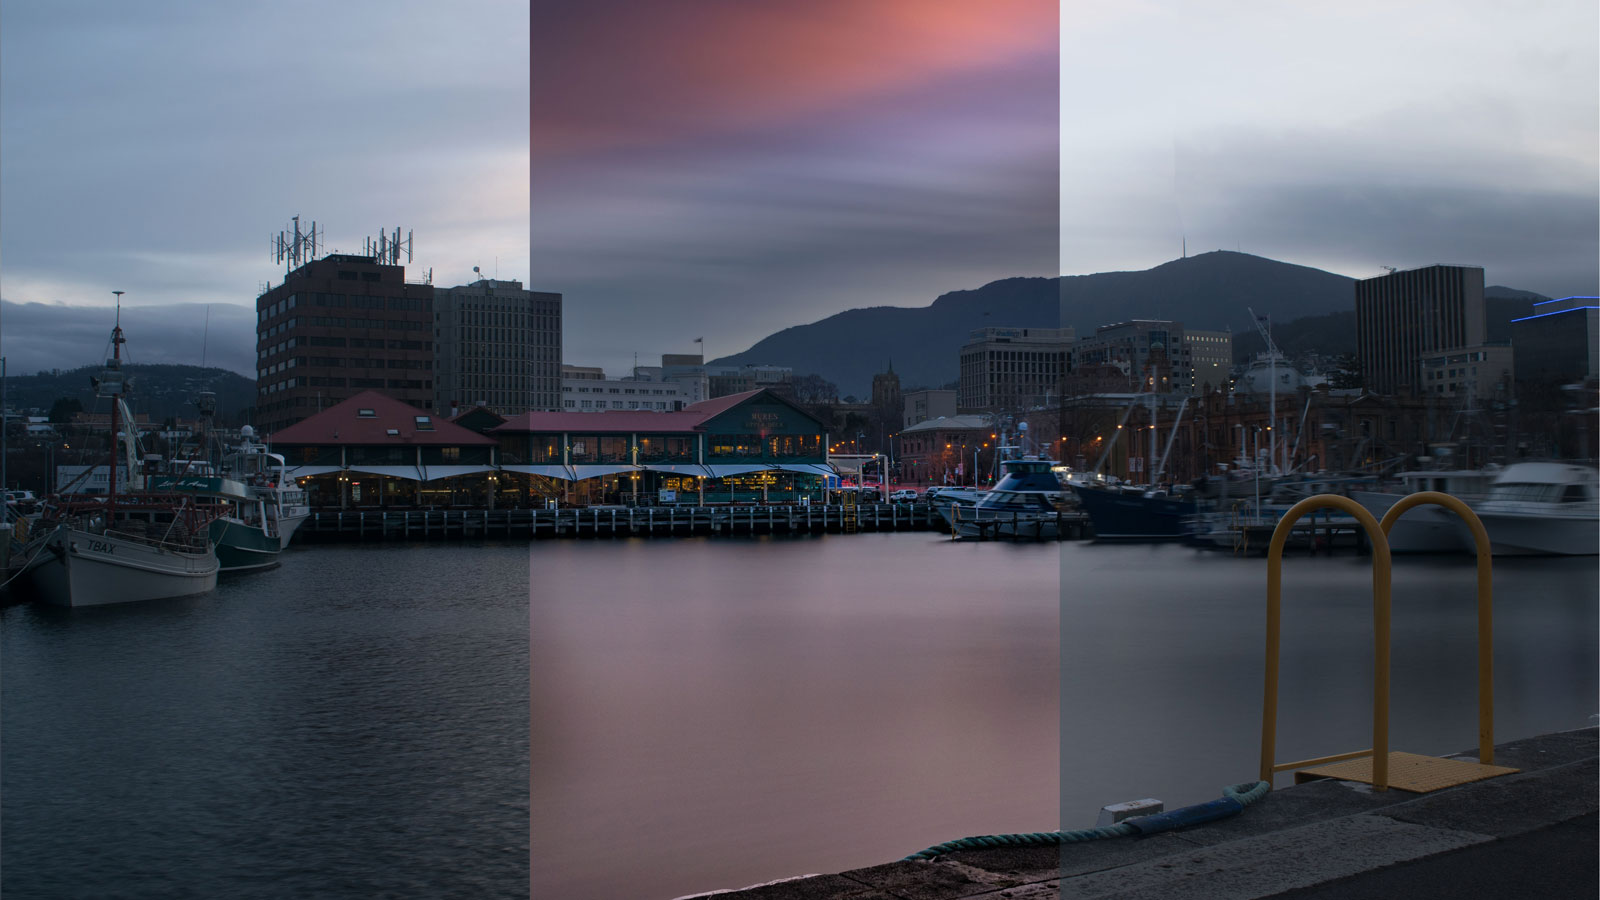
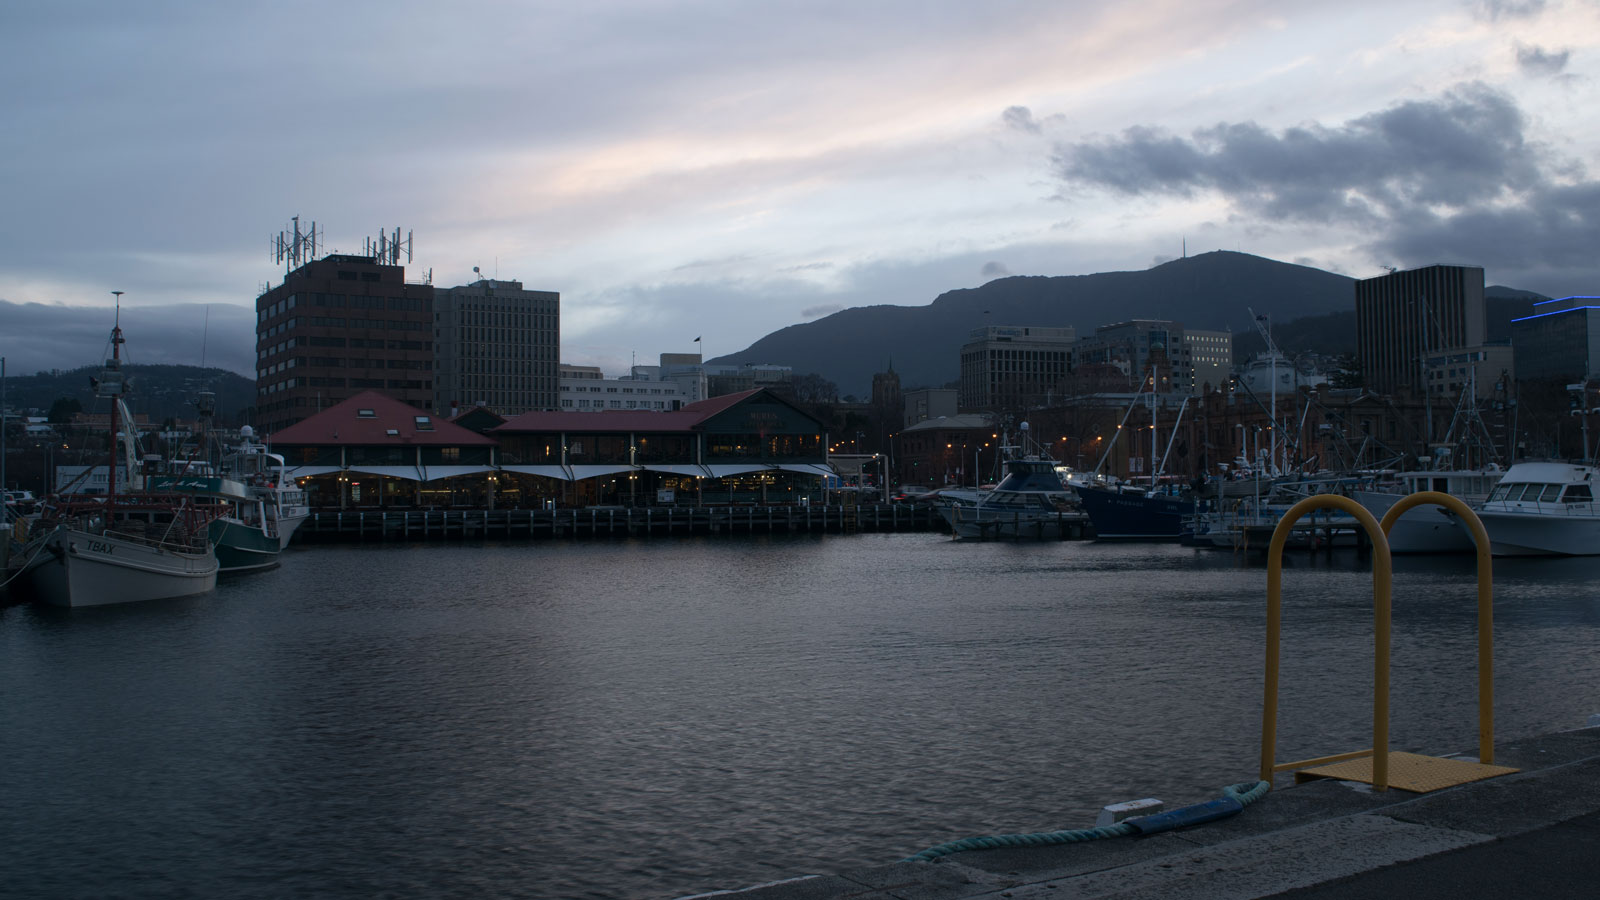
Once I arrive at the planned destination, I set the camera up and fire off my first shot in Aperture Priority Mode. I'm not too worried about settings at this stage. I am only interested in how the image is looking on the back of the camera. I'll move around and take multiple shots from different angles. What I am looking for when I compose my shot is something in the foreground, silky smooth water, some city lights and a silky dreamy sky. As you can see below, my ‘something' in the foreground is the yellow ladder.
Camera Settings and Base Image
I'm now happy with how the shot is looking, it's time to dial in some settings. I'm shooting at about 25mm on my kit Nikon Lens. I have now changed from aperture priority mode to manual mode. I've locked in f/8 as my aperture, ISO is set to 100. My camera is metering at 1/2.5, I know the sky will blow out at these settings, so I reduce the exposure by a stop. I've fired off a shot at 1/5 of a Second. Aperture f/8 ISO 100. It is slightly under exposed but I am confident the shadows can be recovered. So I moved forward with the shot.
The Long Exposure
Now the fun! We have our base exposure, we need to remember the settings that have been used. From here, we need to re check focus and have the remote trigger ready. I screw the RealPro 10 stop filter in the thread at the front of the lens. I am being extremely careful not to nudge or bump the focus ring. Your camera won't be able to meter a correct exposure. I have found the easiest way to re-calculate the new exposure is using an app. I'm a big fan of Exposure Calculator by Quiosoft. The app is telling me the exposure I need is 205 Seconds. From experience, I have realized that when you are pushing a long exposure when the natural light is dropping quickly you need to slightly increase the exposure for the light fall off.
I've decided to increase the exposure from 205 Seconds to 240 Seconds (4 minutes) I've changed the shutter dial to Bulb Mode, trigger in hand and a timer of 4 minutes ready to go on my phone. I simultaneously press the trigger and the timer. During the exposure, it is extremely important not to touch the tripod or camera as this will jeopardise the end result.
 |
 |
Here is the end result, an unedited straight from camera RAW. 240 Seconds f/8 ISO 1000.
Some ND filters are renowned for casting a blue tinge over the image, but as you can see the colour cast using the Kenko REALPRO ND1000 is minimal and the image is still sharp throughout.
In my next post, I will be guiding you through the editing process. I will show you a very basic Lightroom workflow that will help make your long exposure photos zing. But for now, thanks for reading. I hope this tutorial has been beneficial. Head over to my Facebook page and share your results!